Creating a PDF File
|
Step 1 |
Select "Print" from your application (Word®, Excel®, etc.) |
|
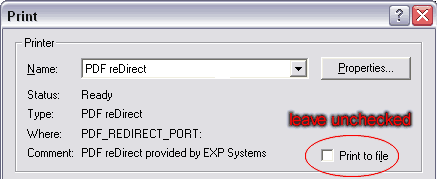
Step 2 |
In the Print Dialog, Select the PDF reDirect Pro v2 Printer. Do not choose to "Print to File", this option is to create printer files (.prn), not PDF files (.pdf).
|
|
Step 3 |
Click on the "Print" Button.
|
|
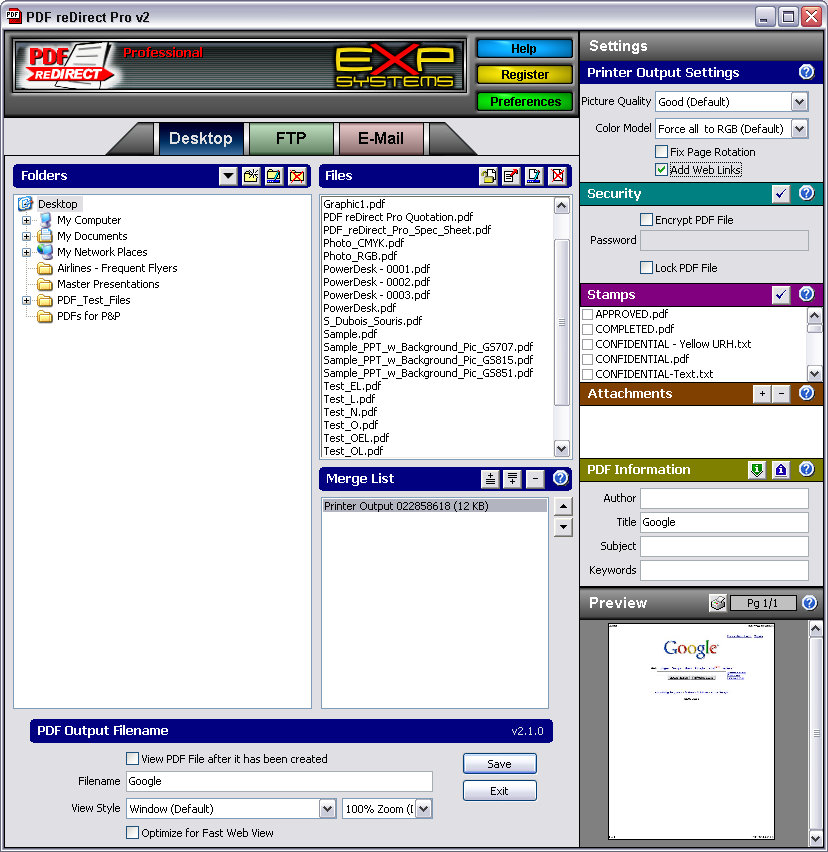
Step 4 |
The main PDF reDirect Professional screen is displayed as shown below.
Note: The filename will be automatically* filled. For example, if you are working on a document called "sales report.doc", the filename suggested will be "sales report.pdf".
|
|
Step 5 |
Save the PDF File Click on the "Desktop" tab and select the drive and folder where you wish to save your file.
When you are happy with your selection, click on the button labeled "Save". |
|
|
Note: Accessing "Mini-Mode" View
|